How to Choose a Hearing Aid: Tips From an Audiologist
This guide will teach you about the different types of hearing aids and how to choose the right one for your needs.
Updated May 28, 2026
SeniorLiving.org is supported by commissions from providers listed on our site. Read our Editorial Guidelines

If you're new to the world of hearing aids, you may be full of questions and feel overwhelmed with the myriad of choices. Which design is right for me? What's the difference between prescription and OTC hearing aids? Doing your research can help resolve some of your questions. Fortunately, we've done much of the research for you for this article!
I began practicing audiology in 1992. Over the years, I've seen thousands of patients and have actively involved myself in consumer groups for hearing loss. I wrote this guide to equip those experiencing hearing loss with the knowledge they need to find a hearing aid.
In this guide, I'll explain the different types of hearing aids that are available so you can decide which will work for you or your loved one. I'll also explain the types of hearing loss that can occur — and the early warning signs you should know.
We’ve researched and reviewed the industry’s top providers to help you find the best hearing aid for your needs.

Our detailed, hands-on reviews of the industry’s most popular hearing aids will give you an inside look at our experience with the company’s products and our key takeaways.

Want a closer look at pricing and value? Visit our pricing pages for these popular providers to learn more and learn how to get the best deal on your hearing aids.
With so many hearing aids on the market, comparing providers side by side is a helpful way to determine which device is best for you. If you’re struggling to pick between two providers, take a look at our comparison pages.
Whether you’re looking for step-by-step how-to guides or resources on Medicare coverage for hearing aids, we’ve got you covered with a wide range of additional hearing aid resources.
I began practicing audiology in 1992. Over the years, I’ve seen thousands of patients and been actively involved in consumer groups for hearing loss. I wrote this guide to accomplish a few things.
First, I’d like more people to seek help for hearing loss. Millions of Americans (mostly seniors) have hearing loss. A discouraging fact has rung true for almost a century: just 20 percent of people who would benefit from a hearing aid wear one. In my experience, a big reason for that is a lack of knowledge. This guide aims to address this.In my experience, a big reason for this is a lack of knowledge. This guide aims to address this.
Second, I wanted to open the curtain on the seemingly endless options for hearing aids. Just like buying a car, there are hundreds of makes and models to choose from. But if you zoom out a bit, all of them have four wheels, a frame, a motor, and a body. Beyond that, most models just differ based on convenience and style. Hearing aids are much the same.
Finally, I wanted to arm you with some not-so-common tools to weed out the good, the bad, and the ugly in terms of who actually dispenses these devices. Returning to the car analogy, you want a mechanic who won’t quit “wrenching” until your ride is purring like a kitten. With a smidge of knowledge and healthy skepticism, you can push your “hearing mechanic” to help you hear the best you can.
Hearing aids are electronic devices worn in or behind the ear. Hearing aids improve the lives of those with mild to significant hearing loss.
Rather, they aren't a cure for hearing loss. Rather, they improve the quality and level of sound around you. It increases your ability to comprehend human speech and enjoy the sounds of life while they're being worn. Once you pop them out, your hearing will revert to its natural state.
The moral of the story? You have to wear hearing aids to reap their benefits. That's why buying the right type is so critical. Hearing aids that don't work tend not to be worn.
Hearing aid technology is constantly changing and improving. But in general, most hearing aids work similarly. When you wear a hearing aid, sound vibrations enter the ear and travel into the ear canal. These vibrations continue to travel through the eardrum and the small bones of the middle ear and into the inner ear. That's where the sound is processed and sent to the brain.
Hearing aids contain one or more microphones that pick up sound, a digital amplifier that makes sounds louder, and a receiver that sends sound into the ear canal. These components work together to amplify and crystalize the sounds around you. Many hearing aids are even engineered to prioritize important sounds, like voices.1

Hearing aids fall into two major categories — in-the-ear (ITE) and behind-the-ear (BTE) — and a few subcategories regarding style or shape. In general, the internal electronics are the same across styles of a given model, but some features may not be available in certain styles due to size. The currently available styles are as follows:

Behind the Ear (BTE): A behind-the-ear hearing aid consists of a small plastic casing that sits behind the outer ear and connects to a custom earmold that fits inside the ear canal via a thin tube. This style is one of the most common and versatile options, suitable for mild to moderate hearing loss. Its larger size makes it easier to handle, clean, and adjust, which makes it a practical choice for seniors.
Extended Wear: Extended-wear hearing aids are placed deep in the ear canal by a hearing care professional and are designed to be worn continuously for several weeks or months without removal. Like BTE devices, they are suited for mild to moderate hearing loss. Because they sit entirely inside the ear canal and require no daily insertion or removal, they are a low-maintenance option for those who prefer a hands-off experience.
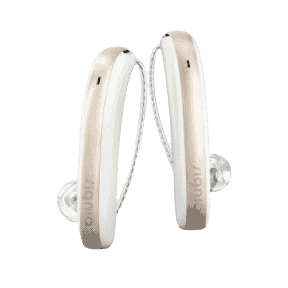
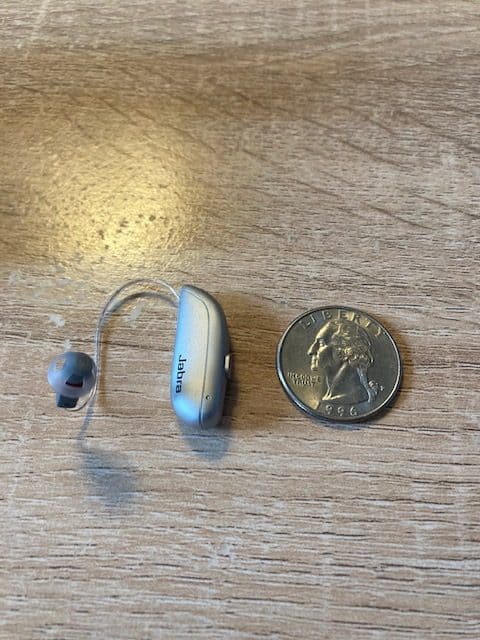
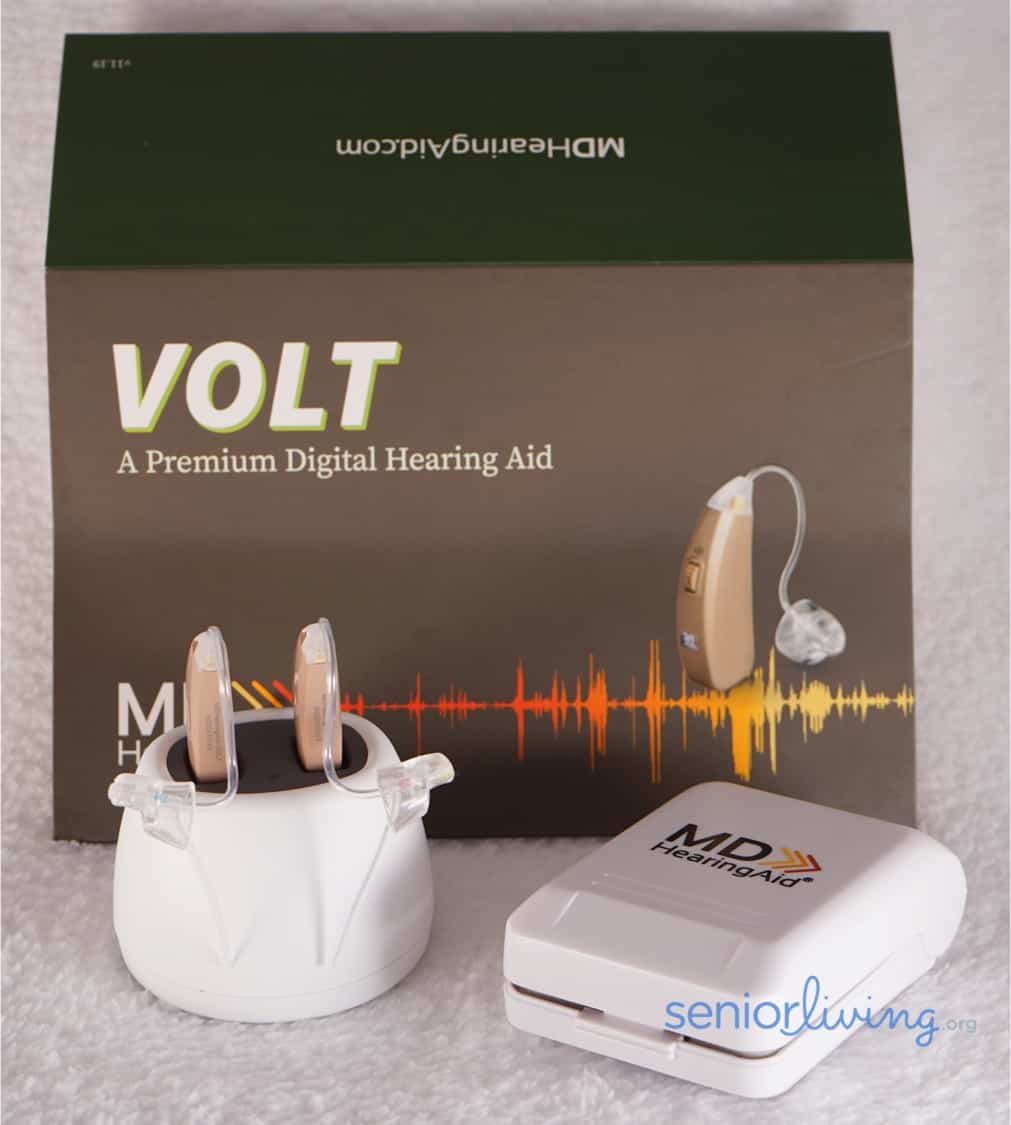
Receiver in Canal (RIC): A receiver-in-canal hearing aid is similar in appearance to a BTE device but uses a thin wire instead of tubing to connect the casing behind the ear to a small receiver that sits directly inside the ear canal. This style is one of the most versatile available, accommodating a wide range of hearing loss from mild to profound. RIC devices tend to deliver a more natural sound experience and are a popular choice among both first-time and experienced hearing aid users.
In the Ear (ITE): In-the-ear hearing aids are custom-molded to fit within the outer bowl of the ear, making them visible but easier to insert and handle than smaller in-canal styles. They are appropriate for mild to severe hearing loss and often include larger controls and longer battery life due to their size. For seniors with dexterity challenges, this style can be a more manageable alternative to smaller, less visible devices.
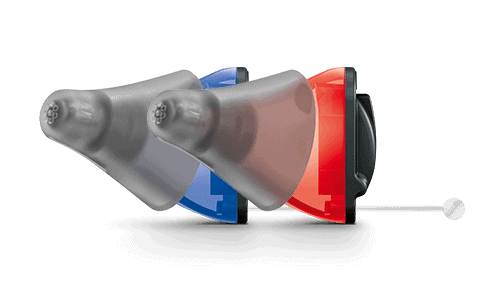
Completely in Canal (CIC): Completely-in-canal hearing aids are molded to fit almost entirely inside the ear canal, making them significantly less visible than ITE or BTE styles. They are designed for mild to severe hearing loss and offer a discreet appearance that many users prefer. However, their small size can make them more difficult to handle and maintain, particularly for seniors with limited finger dexterity.
Invisible in Canal (IIC): Invisible-in-canal hearing aids are the smallest style available, sitting so deeply inside the ear canal that they are virtually undetectable when worn. They address mild to severe hearing loss and are prized for their cosmetic discretion. Due to their very small size, they typically lack some of the advanced features found in larger styles and may be more challenging to insert, remove, and maintain on a daily basis.
As you can see, there are a lot of options when it comes to the size and shape of hearing aids. As an audiologist, I've noticed that most patients prefer not to advertise their hearing loss. The exception is typically younger folks who opt for bright and noticeable BTE versions. People who prefer very discreet hearing aids should see if the invisible-in-the-canal (IIC) or extended wear (EW) options are appropriate for their hearing loss level and needs.
Unless you're completely bald, the receiver-in-canal (RIC) style is nearly invisible in most cases. That's because they can be color-matched to your hair. Hearing aids that look good (or at least acceptable) are very desirable; however, it’s essential to realize that going that small means you may have to compromise on some features.
Take a moment to check out our video on types of hearing aids below. This video covers all major hearing aid types, how they work, and some of their functionalities.
Choosing the right hearing aid can feel overwhelming, especially with so many brands, styles, and features to sort through. For seniors, finding the right fit is about more than just sound quality — it’s also about comfort, ease of use, and finding a device that supports an active and independent lifestyle. Following these steps can help you make a confident, informed decision.
The first step is scheduling a hearing evaluation with a licensed audiologist or hearing care professional. A formal hearing test, known as an audiogram, measures your ability to hear sounds at different pitches and volumes and gives you an accurate baseline for your hearing health. This is especially important for seniors, as age-related hearing loss often develops gradually and may be more significant than you realize.
Hearing loss is typically categorized as mild, moderate, moderately severe, severe, or profound. Understanding where your hearing loss falls on this spectrum is critical for seniors because it directly determines which devices will be powerful enough to be effective. A device designed for mild hearing loss, for example, will not provide adequate amplification for someone with moderate or severe loss.
Over-the-counter hearing aids are now widely available to adults and are a more affordable option for seniors with perceived mild to moderate hearing loss. Prescription hearing aids are programmed by an audiologist to match your specific audiogram and are generally the better choice for seniors with more significant hearing loss or those who have struggled with hearing aids in the past. When in doubt, consulting with an audiologist first is always a worthwhile step.
Hearing aids come in several styles, each with different fit, visibility, and ease-of-use considerations. For seniors, behind-the-ear and receiver-in-canal models are often recommended because they are easier to handle, insert, and adjust than smaller in-canal styles. Those with dexterity challenges or vision changes may find that larger devices with bigger controls are more practical for daily use.
Think about the situations where you most need hearing support — whether that is following conversations at family gatherings, watching television, speaking on the phone, or attending religious services. Many hearing aids designed for seniors include features like background noise reduction, directional microphones, and TV streaming capabilities that directly address these common listening challenges. Choosing a device that matches your daily routine will make it much easier to wear consistently.
Modern hearing aids offer features such as Bluetooth connectivity, rechargeable batteries, tinnitus masking, and smartphone app controls. For seniors who prefer simplicity, rechargeable models eliminate the hassle of replacing small batteries, and some devices include easy-to-use volume controls or automatic adjustments that require little manual input. Focus on features that solve real problems in your daily life rather than the most advanced technology available.
Hearing aids range from a few hundred dollars for basic OTC models to several thousand dollars for premium prescription devices. Traditional Medicare doesn’t cover the cost of hearing aids, though some Medicare Advantage plans do offer hearing benefits, so it’s worth reviewing your coverage before you shop. Setting a realistic budget up front will help you focus your search and avoid unexpected out-of-pocket costs.
Many audiologists and hearing aid retailers offer trial periods that allow you to test a device in real-world settings before making a final purchase. Seniors should take full advantage of this window by wearing the hearing aid in the everyday environments that matter most — at home, at family gatherings, or at a place of worship. A hearing aid that feels comfortable and performs well in your daily life is far more valuable than one with impressive specs that you rarely wear.
Now that we know what types of hearing aids there are, let's talk about hearing anatomy; it will help you better understand what causes hearing loss and how to address it. The human hearing system has four parts:

The type of hearing loss you have determines the kind of hearing aid your audiologist will recommend to you.
Hearing loss can refer to the inability to hear volume accurately, AKA “hearing sensitivity.” Hearing loss can also refer to the inability to hear sounds accurately within specific frequencies; it's called “hearing discrimination.”3
We separate hearing ability into which parts of the hearing mechanism are affected (type of loss), plus how loud sounds need to be for you to hear (severity of loss).
Now that we know a little about what might cause hearing to degrade, let’s talk about how to find out if your hearing isn’t up to snuff.
People with hearing loss tend to exhibit or notice one or more of these behaviors:
In the video below, I further discuss how to spot the early signs of hearing loss with SeniorLiving.org's Editor-in-Chief, Jeff Hoyt.
If you do any of these things more often than you change the oil in your car, you should have your hearing evaluated. There are two basic forms of checking out your hearing: a screening and an evaluation.
A hearing screening is used to determine if hearing loss likely exists. It's not a diagnostic test, and it won't identify the specific type of hearing loss you may have or its likely cause.
These types of tests generally only address the sensitivity part of hearing. They're quick and typically free. Like other types of health screenings, a hearing screening lets you know if further investigation is needed. Hearing tests are available in many apps and websites where hearing aids are sold. You can also use SeniorLiving.org's online screening test as a first step.
A hearing care professional may also recommend a type of test called a pure-tone audiometric screening. These are identical to your hearing test in the nurse’s office in elementary school. Like smartphone apps, they offer insight into your hearing abilities and indicate if further testing is warranted.
They may also recommend a speech discrimination test. This type of test analyzes your ability to clearly hear and discern speech. Presbycusis — age-related hearing loss — often begins with reduced higher-frequency hearing ability. This test helps sleuth that out.
If your hearing screening suggests that you may have hearing loss, it’s best to have a complete hearing evaluation. That can be performed by either an audiologist or a licensed hearing instrument specialist.
Your hearing evaluation will include several tests, including:

Audiologist Dr. Ruth Reisman demonstrates taking a hearing evaluation
Making an appointment to visit the doctor can be stressful, but your first audiologist visit doesn't have to be! Audiologists are trained professionals who specialize in hearing and the ear. They can provide you with a thorough assessment of your hearing loss. Things will be crystal clear in terms of your hearing and your knowledge of your ears by the end. Watch the video below to learn what to expect during your first audiologist visit.
That depends on the level of hearing loss you have. In October 2022, new legislation was passed that allows hearing aids to be sold over the counter. These over-the-counter (OTC) hearing aids are designed for adults with mild to moderate hearing loss and can be purchased online or from a drug store.
There are not currently any OTC solutions available for severe to profound hearing loss; those with higher levels of hearing loss need a prescription for hearing aids suitable to their needs. Prescription hearing aids require an in-person visit to a hearing care professional to assess your hearing needs and help you find the best solution for your hearing loss.
| Category | OTC hearing aids | Prescription hearing aids |
|---|---|---|
| Target hearing loss level | Best for adults with mild to moderate hearing loss | Best for moderate, severe, or profound hearing loss, or more complex hearing needs |
| Hearing test required? | No prescription or in-person hearing test required, though a screening can still help | Yes. A hearing evaluation is performed by an audiologist or licensed hearing care professional |
| Customization options | Usually self-fitted through an app, preset programs, or remote support | Professionally programmed to your audiogram, ear shape, hearing goals, and listening environments |
| Where to buy | Online, through hearing aid brands, pharmacies, big-box retailers, and electronics stores | Audiology clinics, hearing aid specialists, ENT offices, VA medical centers, and some retail hearing centers |
| Cost | Often lower upfront cost, though services and support vary by brand | Usually higher upfront cost, but may include professional fittings, adjustments, follow-up visits, and ongoing care |
| Best for | Adults who want a more affordable, convenient option and have mild to moderate hearing difficulty | People who need more advanced support, custom programming, stronger amplification, or medical guidance |
| Professional support | Typically limited to phone, chat, video, or app-based support | In-person testing, fitting, counseling, adjustments, and long-term follow-up care |
| Can manage severe hearing loss? | No. OTC hearing aids are not designed for severe or profound hearing loss | Yes. Prescription devices can be fitted for more advanced levels of hearing loss |
There are several places to buy hearing aids, including audiology clinics, retail chains, VA medical centers, and online. Below is a complete list of where you can purchase hearing aids:
If you purchase OTC hearing aids, the devices will be shipped right to your door — you won't need to visit a hearing care professional for fittings or adjustments. OTC providers typically offer remote help.
You can get all set up from the comfort of your home; however, these hearing aids aren't usually as customizable as prescription hearing aids. Some OTC hearing aids may even be preprogrammed with little to no room for adjustments.
Keep in mind that wearing hearing aids has a learning curve. Allow yourself time to adjust. In the long run, this will provide you with enhanced hearing ability and, hopefully, more enjoyment of life!
After purchasing prescription hearing aids, you need your devices fitted and programmed to your specific hearing needs in person. If you work with an audiologist, the hearing aids you select will be ordered; then, you will return for a fitting between two days and a few weeks. The audiologist will adjust your hearing aids to fit your ears and set your sound levels for optimum listening throughout multiple environments. They'll explain how to use all the programming features, such as using Bluetooth, while you drive. Of course, they'll also answer any questions you may have.
If properly fitted, hearing aids shouldn’t need many adjustments. However, it’s vital to specify precisely how many adjustment appointments come in the price and how much additional service might cost. It varies between providers, and it can represent significant ongoing costs.

Dr. Ruth Reisman testing and customizing a pair of hearing aids
As you can see, getting hearing aids is not as simple as grabbing a pair of readers off the rack at the drugstore. Nor is it an impossible task!
Hearing is one of our primary senses because it connects us with the thoughts and emotions of those in our lives. As such, it's worth researching thoroughly, asking hard questions, and being patient to find a solution and provider that matches your needs and personality.
After the devices hit your ears, a process of neural rewiring begins that can take up to three months, so be patient. Seek the advice of others who have walked in these new and louder shoes. On the lighter side, remember that the volume control on your new hearing aids gives you the superpower of reducing the rhetoric and amplifying the awesome!
Whether you need a prescription for hearing aids depends on the severity of your hearing loss. In recent years, adults with perceived mild-to-moderate hearing loss could purchase over-the-counter hearing aids without a prescription, making the process more accessible and affordable than ever before. However, if your hearing loss is moderate to severe, profound, or medically complex, a prescription from a licensed audiologist remains the recommended approach to ensure you receive a device powerful enough to meet your needs.
No, OTC hearing aids cannot treat severe hearing loss. Over-the-counter hearing aids are not designed or approved for severe or profound hearing loss. They are intended for adults who perceive their own hearing difficulty as mild to moderate. Using an underpowered device for a more significant hearing loss can leave you frustrated and underserved. If you have severe or profound hearing loss, a professionally fitted hearing aid prescribed by an audiologist is the appropriate and more effective option.
There is no single best hearing aid for all seniors, as the right choice depends on your degree of hearing loss, lifestyle, dexterity, and budget. That said, top brands include Jabra, MDHearing, and Eargo. Getting a professional hearing evaluation first is the best way to narrow down which specific device and style is right for you. Seniors often benefit most from devices with rechargeable batteries, simple controls, background noise reduction, and comfortable behind-the-ear or receiver-in-canal styles that are easier to handle than smaller in-canal models.
Hearing aid prices vary widely depending on whether you choose OTC or prescription devices. OTC models can range from around $200 to $1,500 per pair, while prescription hearing aids typically range from $2,000 to $7,000 or more per pair, often bundling in professional fittings, adjustments, and follow-up care.
Cheap or budget-friendly hearing aids can be a worthwhile starting point for seniors with mild hearing difficulty who want to try amplification before committing to a higher-cost device. However, very inexpensive models may offer limited customization, fewer features, and less reliable sound quality compared to mid-range or premium options. If your hearing loss is more significant or your listening environments are complex, investing in a better-quality device — even if it costs more upfront — is likely to deliver a noticeably better experience.

NIH. (2025). Hearing Aids.
Widex.com. (2025). DISCRIMINATION HEARING LOSS.
UNC School of Medicine. (n.d.). Understanding Hearing Loss.
WHO. (2020). Deafness and hearing loss.
Wexner Medical Center. (n.d.). Hearing Loss.
CDC. (2024). Challenges Affecting Health Literacy of Older Adults.
Hopkins Medicine. (n.d.). The Hidden Risks of Hearing Loss.
U.C. Davis. (2024). Now, hear this! Help change mindsets for World Hearing Day.