How to Put in Hearing Aids
Inserting and removing your hearing aids is a breeze with a little practice.


SeniorLiving.org is supported by commissions from providers listed on our site. Read our Editorial Guidelines
If you’re a proud owner of a new pair of hearing aids, congrats! In addition to improving your listening experience, hearing aids have been shown to improve brain function and memory in older adults. Though there are many benefits to wearing hearing aids, we also know they aren’t exactly cheap. To reap all the benefits of your investment, it is essential to properly place and remove your hearing aids.
We’ve rounded up some tips and tricks for putting in and removing your BTE, ITE, and IIC hearing aids. Getting your hearing aids in and out of your ear will become second nature in no time!
FYI: If you still struggle to use your hearing aids after reading our tips here, it might be time to look for a new pair. Visit our guide to the best hearing aids in 2026 to find a better fit.
Quick Tips for Placing and Removing Your Hearing Aids
- Use your right hand to insert your right hearing aid. The same goes for your left.
- Use a mirror to see exactly what you’re doing.
- Identify the right and left hearing aids by the red and blue markers on the device. Red is for right, and blue is for left.
- Keep your hearing aids clean for an optimal fit and hearing experience.

Our editor's grandma wearing her freshly cleaned BTE devices. You can barely see them!
How to Insert and Remove Receiver-in-Canal (RIC) and Behind-the-Ear (BTE) Hearing Aids
There are slight variations in BTE and RIC hearing aids, so you may have to make adjustments according to your particular brand, model, and style. Below, we’ll go over how to put in and remove RIC and BTE hearing aids. We’ve also included images of proper placement for each type of hearing aid, so you can get an idea of what they’ll look like when worn correctly. Just remember, every brand and style will look a little different!
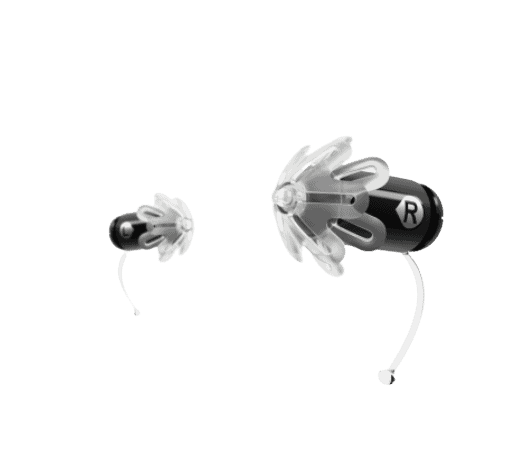
Inserting Receiver-in-Canal (RIC) Hearing Aids
- Before you begin placing your RIC hearing aid, make sure you’ve removed your eyeglasses if you have them, or anything else that may be tucked behind your ear.
- Hold the top of the hearing aid between your thumb and index finger.
- Next, slide the hearing aid over the top of your ear and tuck it behind your ear, as you would do with a pair of glasses.
- Now, the wire and the dome should be dangling on the front of your ear. Using your thumb and index finger, grip the dome and push it into your ear canal. Next, take your index finger and apply slight pressure to the dome in your canal. Use small circular motions with your finger to further push in the dome. If you have a custom earmold, you may find it helpful to pull down on your earlobe as you push in the circular motion above to seat the earmold. You should not experience any pain or discomfort when placing your BTE hearing aid. If you do, consult your hearing care professional for guidance.
- The dome will be properly placed inside your ear when the wire at the top of your ear has disappeared against the front of your ear and lays flush against your head.
- If you have new hearing aids with a stabilizer (a thin plastic arm attached to the speaker between the dome and the wire), it will stick straight out across your earlobe. Using the index finger and thumb, tuck the wire into the bowl of your ear. With regular use, the stabilizer wire will adjust to the curve of your ear and naturally tuck inside the bowl of your ear.
- Once your RIC hearing aid is placed properly, you should not be able to see the hearing aid when looking at yourself straight in the mirror.

Phonak – RIC hearing aids. Photo credit – Phonak
Inserting Behind-the-Ear (BTE) Hearing Aids
BTE hearing aids are very similar to RICs, except that the wire on an RIC is replaced by a thin plastic tube on the BTE. The insertion process is essentially the same, so you can follow the steps listed above. Just make sure not to kink the tube when placing the dome or earmold in your ear.

Phonak – BTE hearing aids. Photo credit – Phonak
Removing RIC and BTE Hearing Aids
- With your index finger and thumb, remove the top of the hearing aid from behind your ear.
- Give a gentle tug to pop the dome out of your ear canal.
- Once you have removed the hearing aid, open up the battery door to save your battery life.
FYI: If you have rechargeable hearing aids, make it a habit of placing them on the charger once you remove them. This can help you avoid misplacing them and will keep them fully charged for when you’re ready to use them again.
How to Insert and Remove In-the-Ear (ITE) Hearing Aids
ITE hearing aids are custom-made and sit in the canal and the bowl of the ear. Depending on the brand and model you have, placing and removing your ITE hearing aid may vary slightly.
Inserting In-the-Ear (ITE) Hearing Aids
- Hold the hearing aid between your thumb and index finger. Make sure the battery door of the hearing aid is facing out.
- Insert the canal part of the hearing aid into your ear canal.
- Gently twist the hearing aid until the helix (top part) of the hearing aid is comfortably nestled into your outer ear.
- Once the hearing aid is properly in place, it should sit securely in the bowl of your ear.

Phonak – ITE hearing aids. Photo credit – Phonak
Removing In-the-Ear (ITE) Hearing Aids
Use your index finger to pop out the helix of the hearing aid. It should loosen easily and come out of your ear.
Pro Tip: If you have trouble removing your ITE hearing aid with your finger, a notch or string may be able to be added to your device so it’s easier to remove. Speak with your hearing care professional about available options.
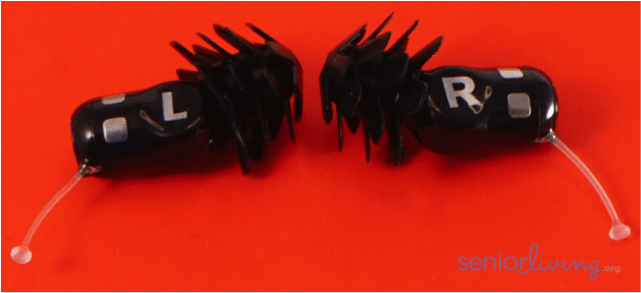
How to Insert and Remove Invisible-in-Canal (IIC) Hearing Aids
Invisible-in-canal hearing aids are custom-made and the smallest hearing aids you can get. Since they are so small, a removal string is standard for placing and removing them. Remember, how you put in and remove your IIC hearing aids may vary slightly, since they are customized to your canal.
Inserting Invisible-in-Canal (IIC) Hearing Aids
Identify the top and bottom part of the hearing aid. On most models, there is a dot identifying the top. If there is a vent, this, as well as the removal filament, is usually on the bottom.
Hold the removal filament between your index finger and thumb, with the top dot on top.
Place the hearing aid in your ear canal, then use your index finger to gently nudge it into your canal. Since the hearing aid is customized to your canal, it should slide in very easily. If you feel any resistance, apply light pressure and move your finger in small circles toward the back of your head to guide the hearing aid into place.
The IIC hearing aid is properly inserted when it is invisible and comfortable in your ear. The removal string should be hanging out your canal.
Removing Invisible-in-Canal (IIC) Hearing Aids
Hold the removal filament between your thumb and index finger and gently tug to remove the hearing aid from the canal.
Did You Know? It can take up to four months to adjust to hearing If your hearing aids are uncomfortable, or you receive feedback when wearing them, your hearing care professional can work with you to overcome any challenges as you adjust.
Take Our Free Online Hearing Test
Wondering if you have hearing loss?
Grab your headphones and get an evaluation in minutes.